You have customised a chart, then copied both chart and related data to another area ready for new data. You then amend the copied data, e.g. to show sales of a different business and…. oh! There is a problem…
What you expect
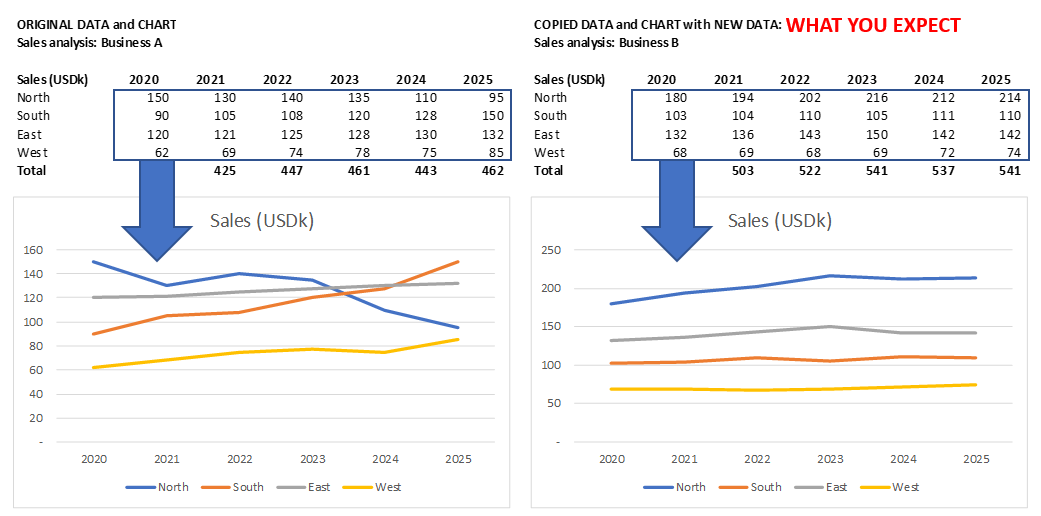
The copied chart should be linked to the copied data – this is logical but not what actually happens.
What you get

The copied chart is linked to the original data so doesn’t change when you amend the copied data. The selected data for the copied chart must be manually edited. This is a pain. ☹
And when you do that, you may well notice a second problem…
If you have edited the original chart e.g., changed line colours, added customised markers and data labels, these are mostly lost when you amend the data source in the copied chart. ☹
↪ The workaround
You can copy the entire sheet, then cut and paste the data and graph on the copied sheet back to the original sheet, but this is inefficient. You may also have to edit the axis labels e.g., for years if these were linked to a row at the top of your (copied) worksheet.
✔ The proper solution
Dear Excel development team at Microsoft… will you please fix this?
🗳 Your vote counts
Please like my related post on the official Excel community by clicking on the up arrow icon.